

How To Repair Stucco On Exterior Of House
It'due south about fourth dimension I share more about our landscaping projection that I've been teasing about for awhile. I concluding left off sharing how I saved thousands of dollars and saved leaf from the landfill when trying to clear out our front grand to make way for new plantings.
One time nosotros removed the existing plantings and admired our dirt pile, it became obvious that there was some stucco repair to be done. I'm here to share what I did, how I did it, and give you lot some satisfying before and afters to bask.
Now, I realize this isn't a DIY project that most people need to do. But I want to share this post to keep you updated on the work that went into the restoration of my home and demonstrate the power of a determined DIYing woman (me). If y'all have the privilege of fourth dimension, free energy, physical ability, and coin, you can do nigh whatever home comeback project - even the unglamorous ones. Plus, I took a bunch of photos, and so I need to publish them on the net - If I don't testify I did it, did the project didn't even happen??
If you oasis't already, click hither for a preview of all of my posts near the adjourn appeal of the house including the befores, the new roof, managing the foliage, and my favorite gardening tools.
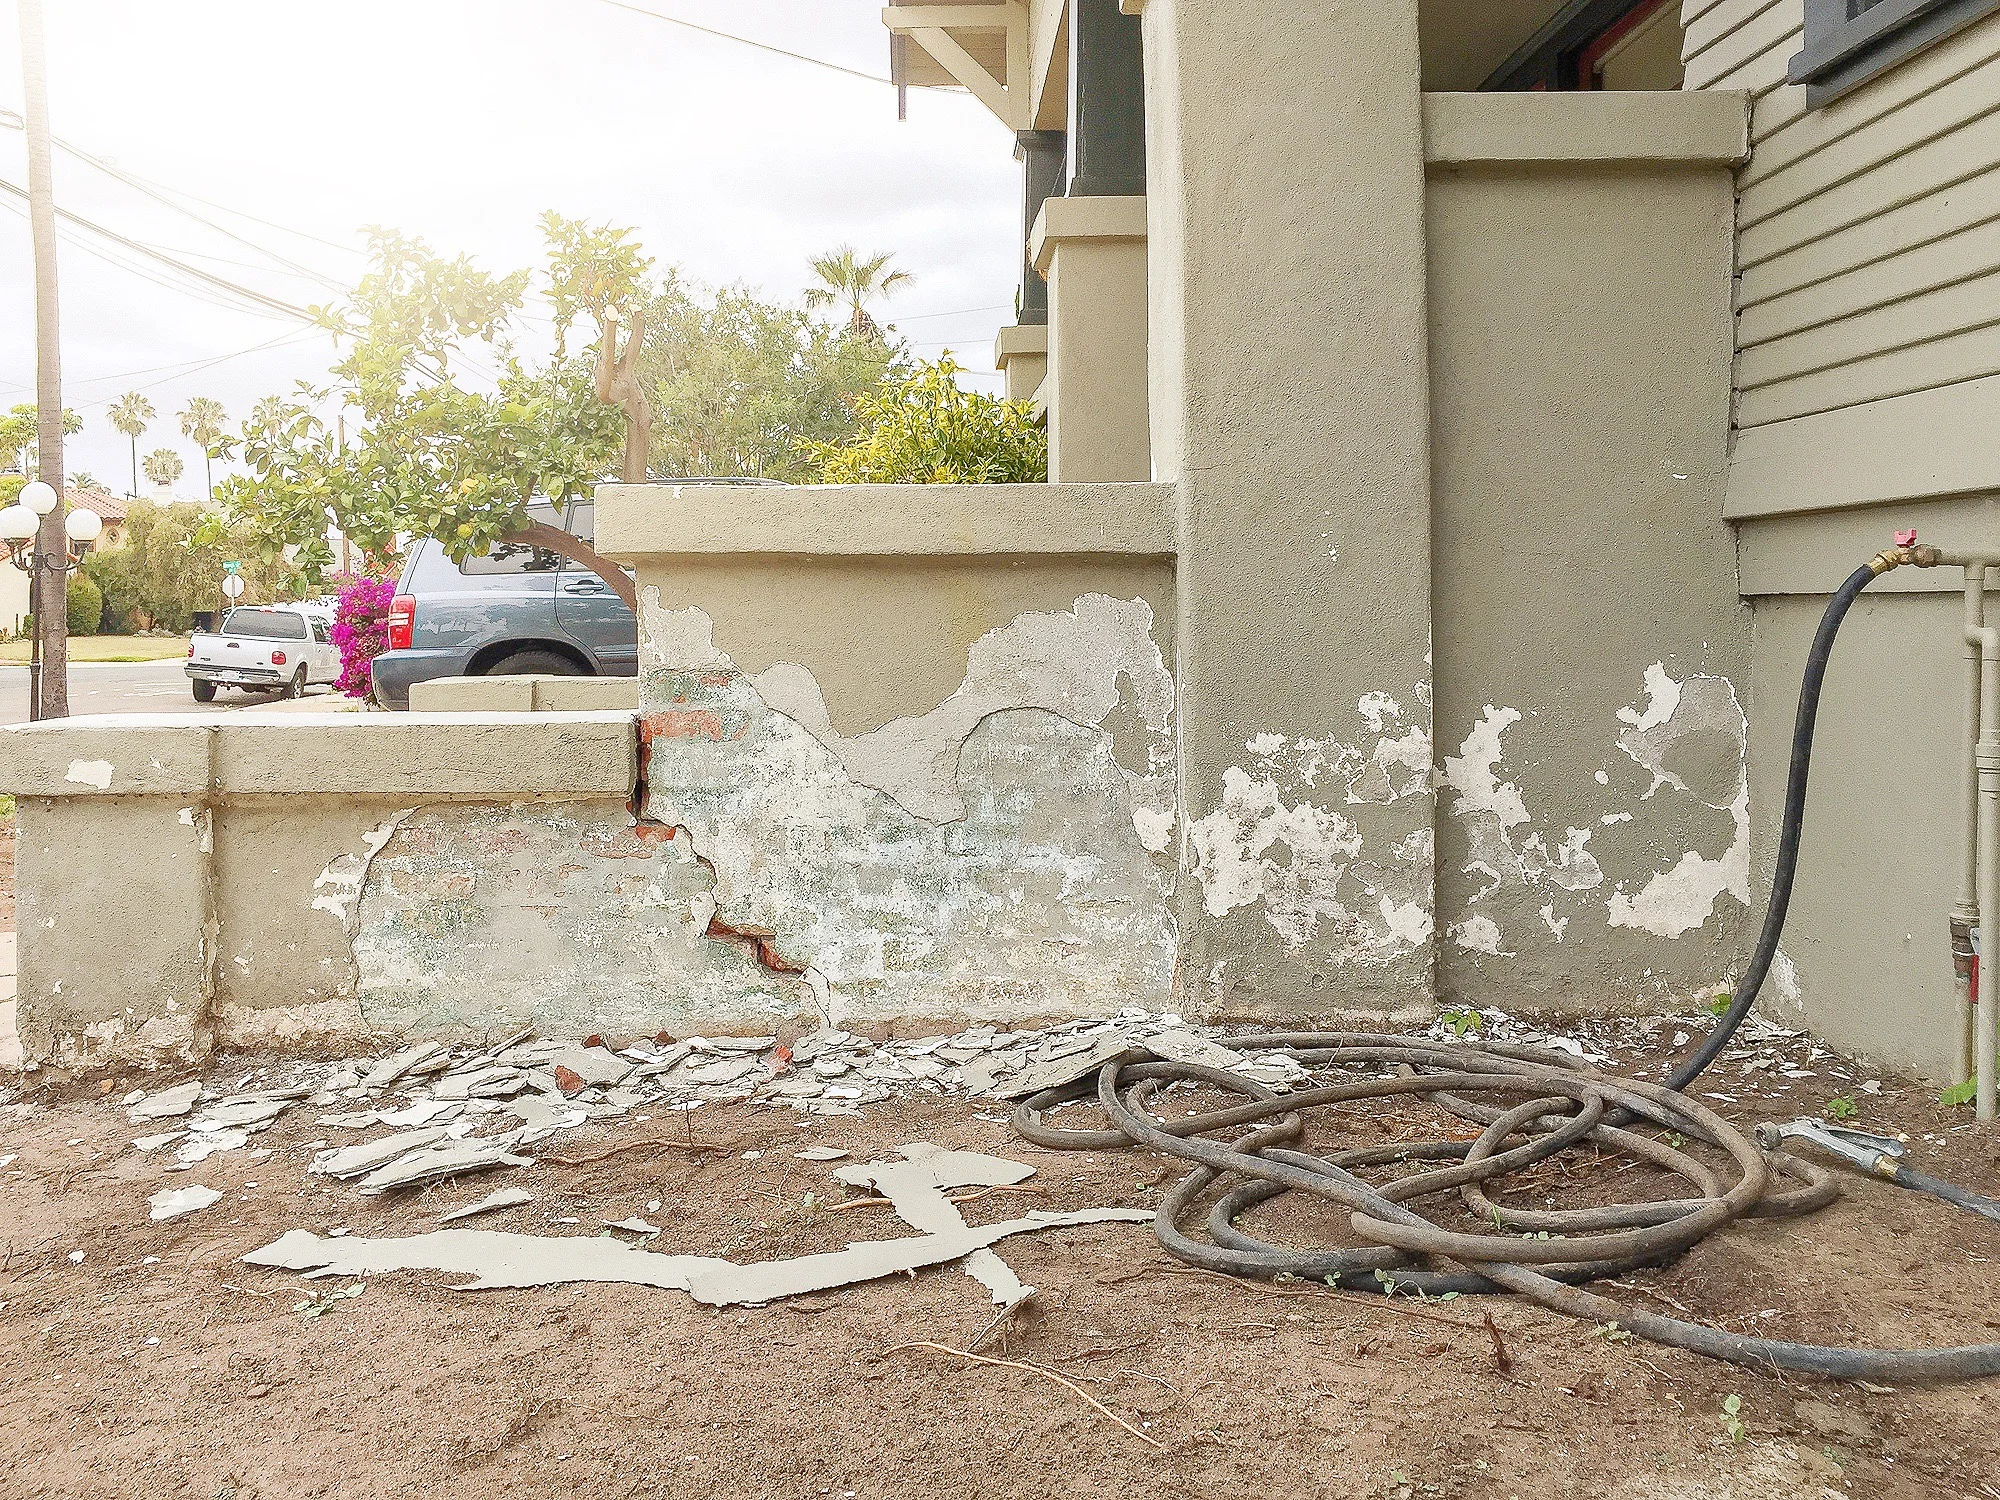
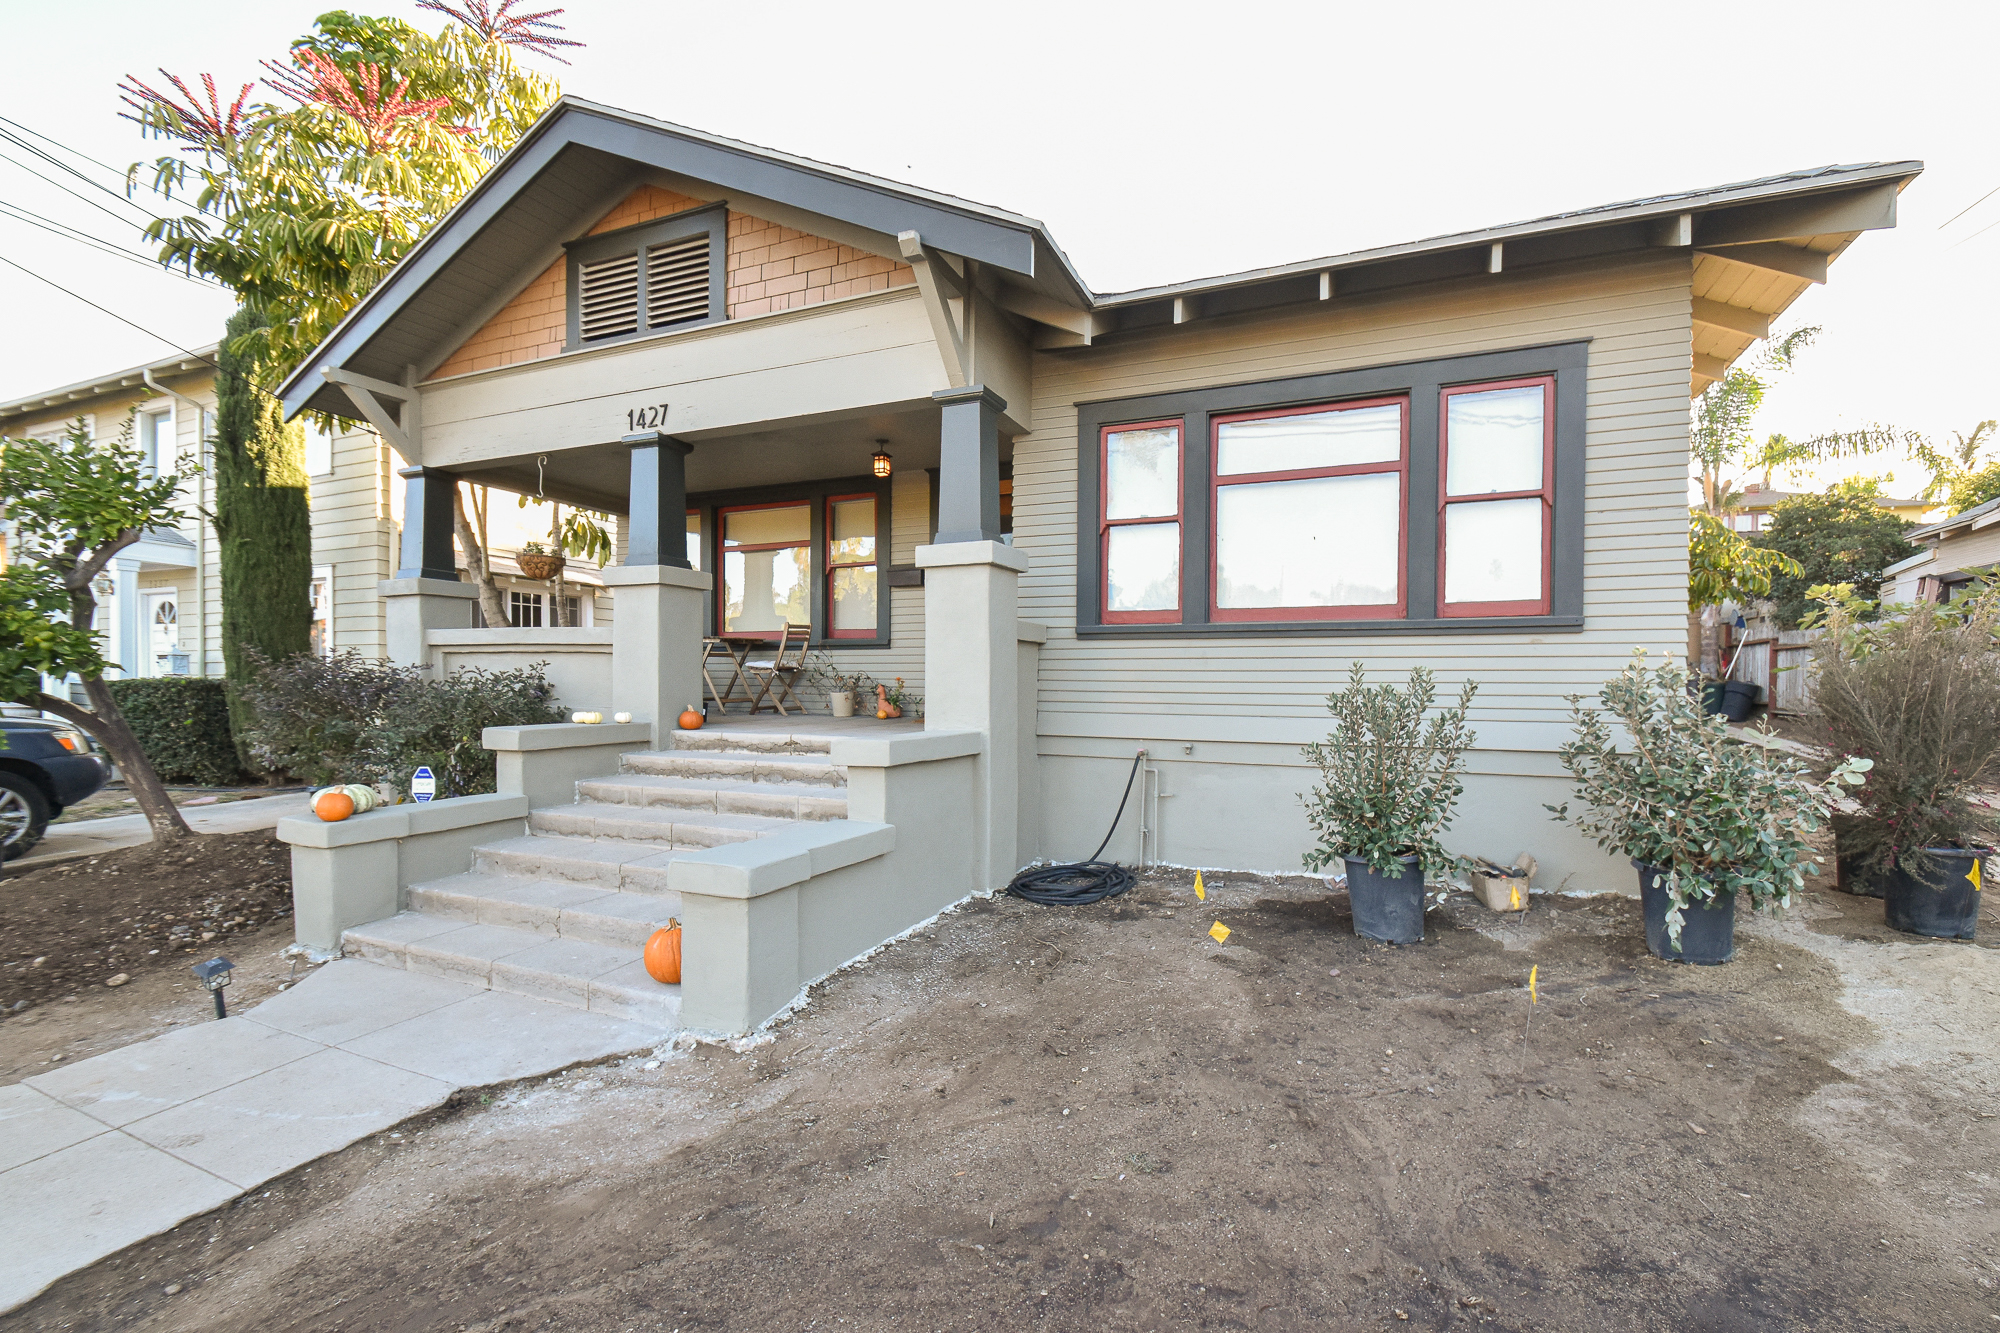
Our firm is primarily wood siding, but the foundation and porch are all stucco over brick. After the distracting dead plants were removed, the damaged stucco became the new eyesore.

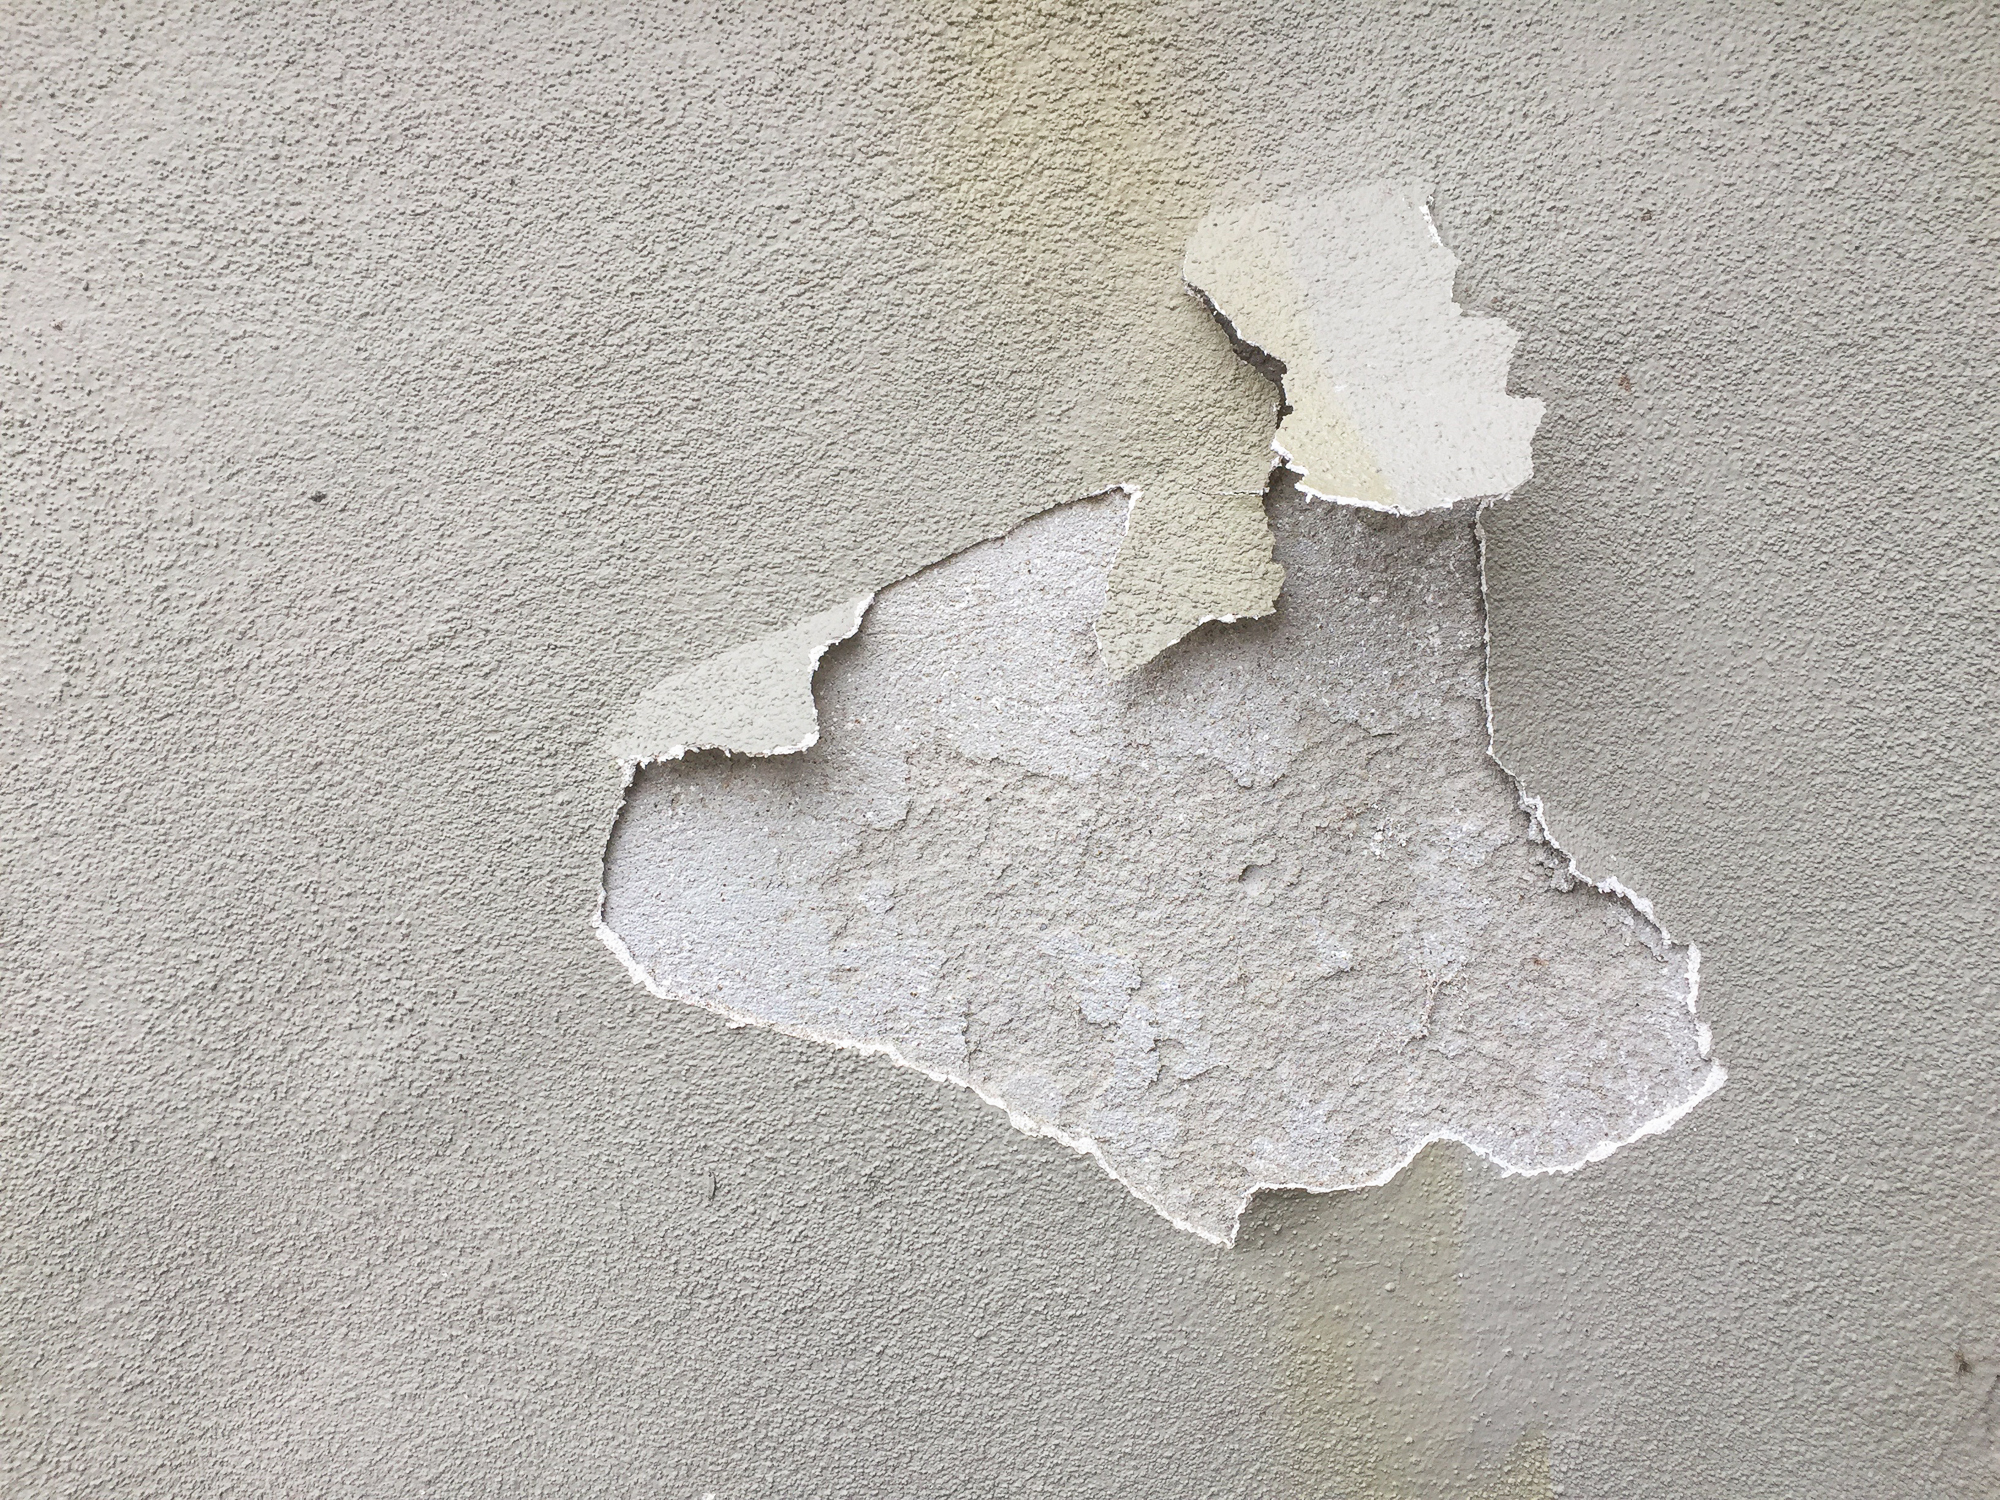
Pieces were cracked, flaking, or missing. Some was coming off considering vines got in behind the terminate coat of stucco. Luckily, information technology wasn't structural so there was no urgency to repair it, but if there was a time fix it, information technology'd be when the perimeter of the house was free of foliage.
So, I got to work. I somehow concluded upwards doing this project in the dead heat of summer, without shade, and sitting on soil infested with ants. In that location are style worst projects to do out there, but if you do this 1, I don't recommend doing information technology in when information technology'southward blazing hot out and maybe habiliment those boot/pants that fishermen habiliment to prevent the ant bites.

I got to work with my trusty 6-in-1 tool to chip away all of the stucco that was loose. And then cleaned off the flaky edges with a wire castor. I scraped off the finish coat and the base coat - anything loose, it came off.
I scraped


and scraped.
What I thought would be a couple of little patch jobs turned into refinishing all of the front porch and large swaths of stucco around the perimeter of the house.
One time I scraped all of the loose pieces off and sufficiently shaved all of the pare off my knuckles, it was fourth dimension to patch everything back up.


I got the materials at a building supply place that primarily sells directly to contractors doing major jobs. About orders are put on a truck bed using a forklift and a palate full of materials. I think I received the tiniest lodge on a forklift always (encounter the single bag in the upper correct corner) and loaded it into one of the well-nigh not-truck-similar automobiles (Prius) - and I'm proud of it.

Disclaimer: I'm going to evidence you lot what I did for MY particular projection. There are a bunch of products and techniques out there. I highly recommend Kirk's videos for learning the many different means to use finishes with different products. As well I did this projection over iii years ago, and then my memory of all of the footstep-by-steps is a trivial rusty.
I did 2 steps of the stucco process. The base glaze and the finish coat. Depending on the job, you can get abroad with just the finish coat, or if you're doing a fresh stucco job, y'all'll need a scratch coat on top of the wire mesh. Only, I'm not going to cover that since I didn't do it.
No affair what projection you're doing, you'll want to spend nearly 100 hours watching Kirk Giordano videos on YouTube. Even if you aren't doing this projection, yous'll even so want to watch because his cadency makes me chuckle and he's super informative. I also find these videos as satisfying as watching people make a cake. I'm going to reference Kirk several times in this postal service considering I owe everything I know to him.
Anyhow. Here's what I did in summary.

1. Scrape away loose materials
I shared this higher up, but I must repeat over again that removing loose pieces and dust is super duper important. New material won't stick to the flaky dusty stuff.
Side note. There's something that I actually like about revealing the brick underneath the stucco. Information technology'southward such a beautiful reminder of the work that went into edifice my house over 100 years ago. I notice it kinda neat to touch the piece of brick that someone else touched merely hasn't been seen for 100 years. Ya know what I mean?
two. Mist the surface with a hose
Misting cleans off the surface and adds wet to the brick to aid in the adhesion. Without the water, the brick might pull too much water out of the mud and and so the cement won't cure properly.

3. Mix the base coat
For my project, I chose to do a base coat to fill in the deep cavities and imperfections. Some folks only use a color coat but since that needs to be applied and then thinly, it would have required viii or so layers, and I didn't want to practise this viii times. Two coats would exist plenty for me. I went for a base coat that I could brand extra thick, and so put a color glaze on top to go the texture I wanted.
I used this for my base coat. It'south a portland cement with added polymers for adhesion and support. Information technology's designed for EXACTLY what I was doing - filling cracks and preparing for a finish coat. Some folks recommend painting an adhesive glue on the wall before applying portland cement, only this was basically a 2-in-1 so it saved me a step.
Since I was only ane person, I couldn't work with besides much mud at a time or else it would all dry out. Because I was mixing small batches, I didn't need a heavy-duty cement mixer and then using my drill with a cement mixer zipper worked perfectly for me. If I had a team of helpers, the drill may non take had the power to keep upwardly.
I used a large bucket that I had on hand to add water and dry out mix. I followed the package instructions which said to mix to a peanut butter consistency and then let it sit down for 5 minutes. I exercise as I'm told.

4. Use the hawk and trowel to apply the mud
Once the mud was mixed in the large bucket, I scooped information technology onto my hawk. Yous can use a professional bucket scoop or dump the whole saucepan of mud onto a tabletop. Only I used an empty hummus container. Because I'm extra professional.

The hawk is basically a flat piece of metal on a handle designed kinda like y'all're holding an ice cream cone with a pizza box glued on top. It lets y'all hold the mud on it but also lets y'all hands scrape it onto the trowel. It takes some exercise to become the hang of how to apply it, merely once you get going information technology becomes second nature. I liked using a "pool trowel" because it had curved corners which made the awarding more forgiving for a newbie.

Apply the mud with the trowel always from the bottom upwardly. At first, the goal is to become the mud on the wall, then after everything got coverage, I went over it with the trowel to smooth it out and feather the edges into the existing stucco. This description I gave is non plenty, you definitely need to scout Kirk in action.
5. Brand repairs to major cracks
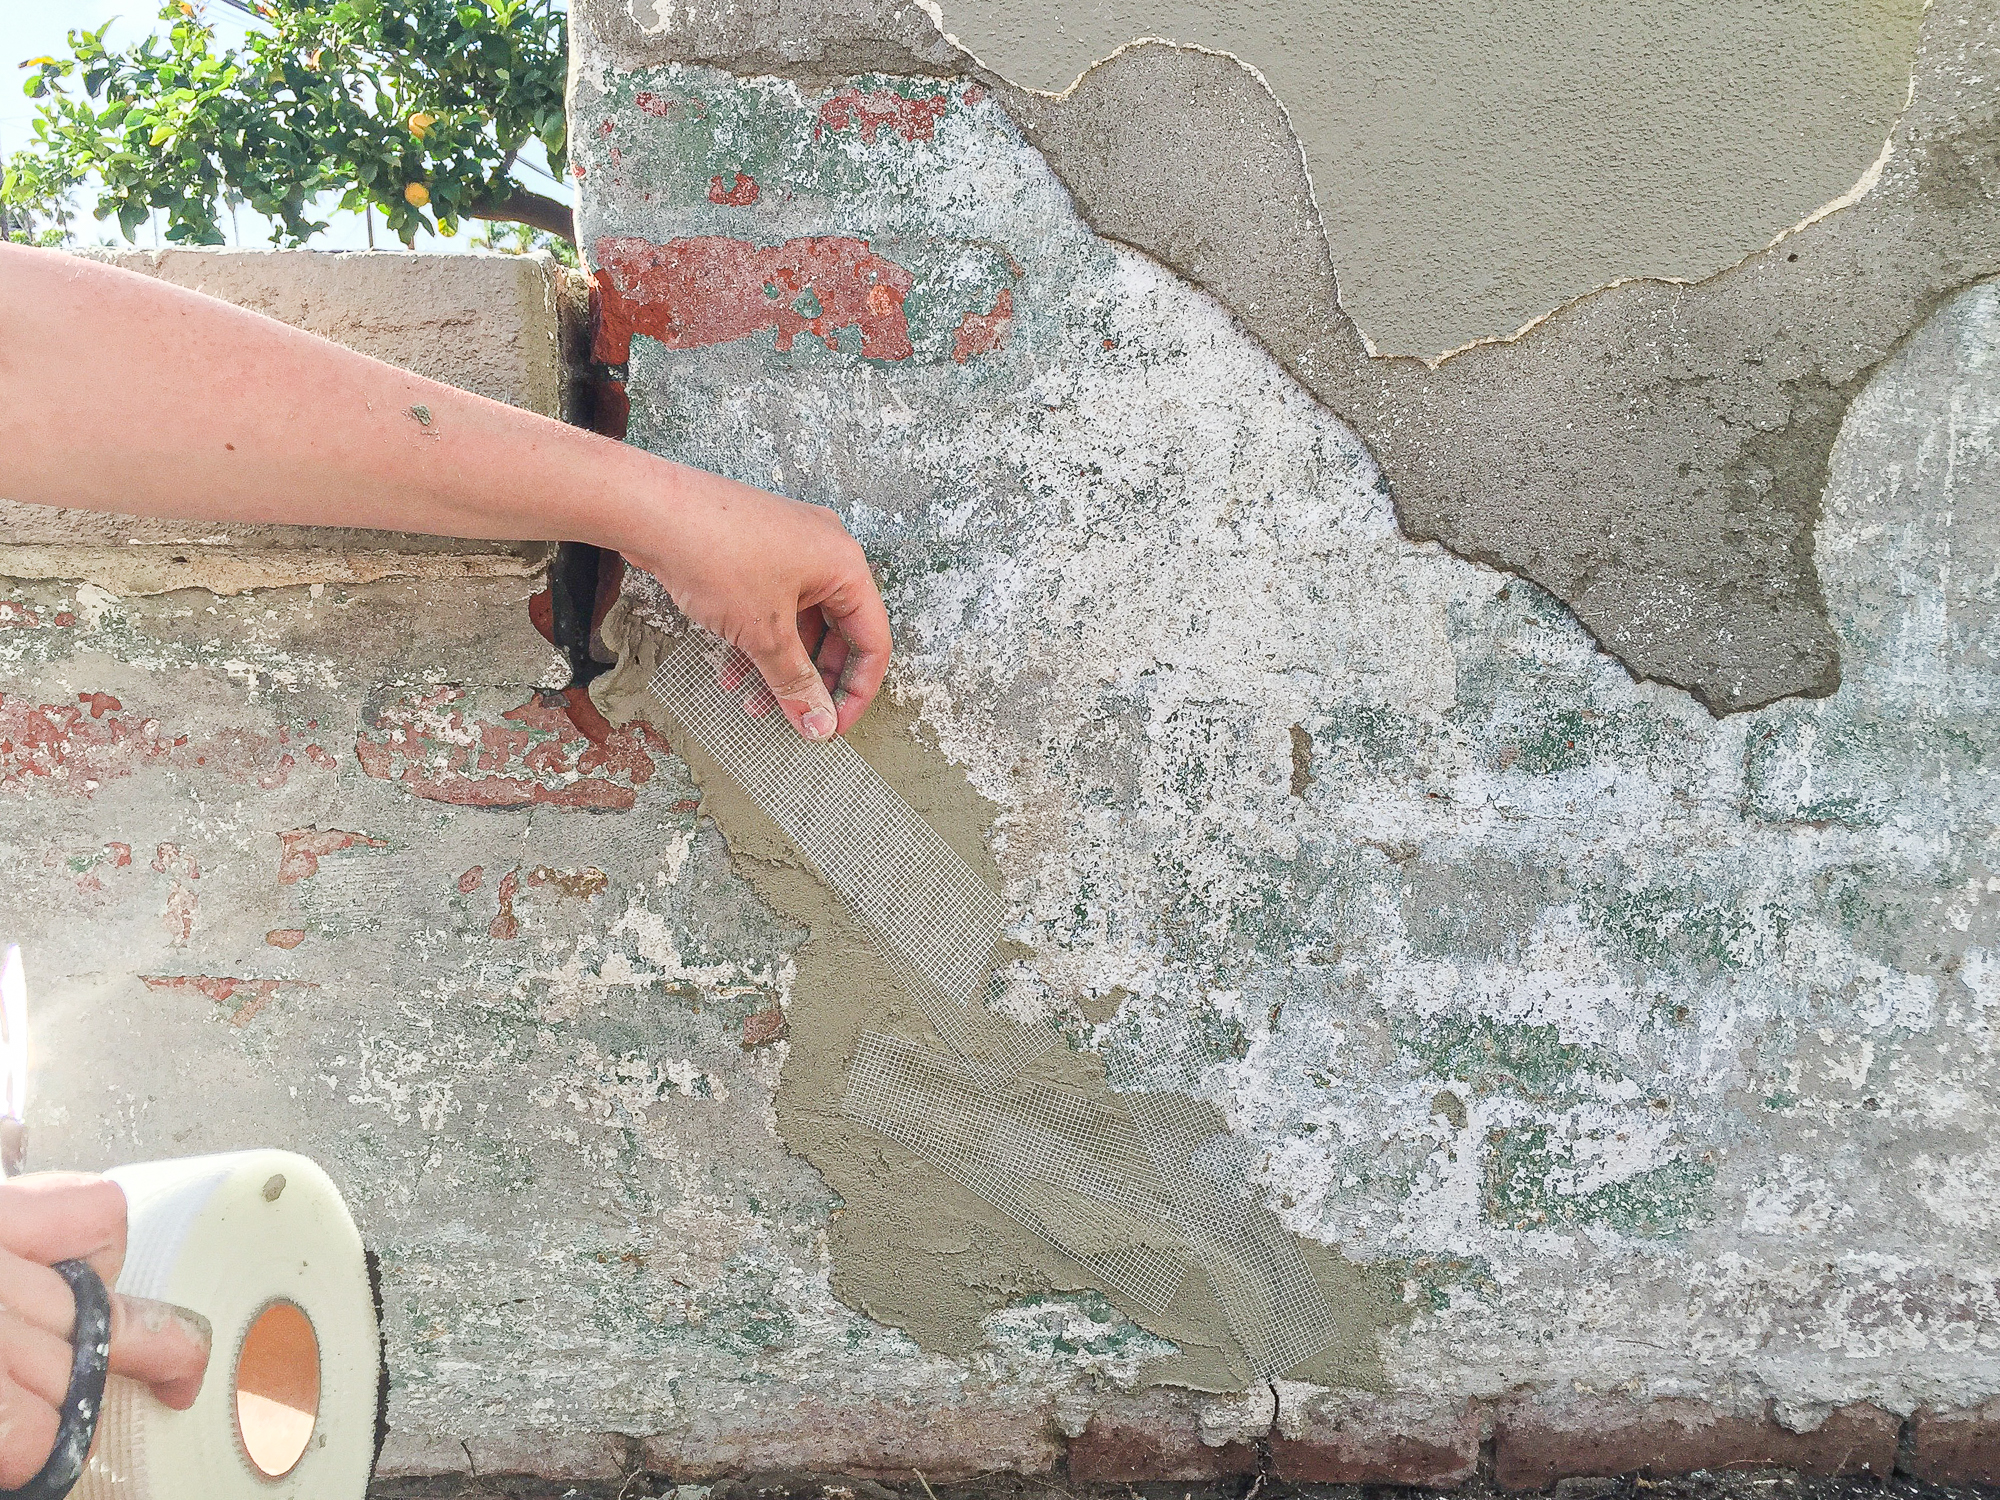
I had a big cleft at the stairs that I wanted to reinforce while I was at information technology. There are a few unlike options out there from filling with special exterior caulk to merely filling with the base glaze. At the recommendation of the nice man at the building supply visitor, I tossed on a few pieces of fiberglass mesh tape that I already had on hand from when I did interior wall repair. Then, I coated over the tape with a thin coat of the base mud. Who knows if those pieces did anything, but information technology's three years afterwards and there'due south not even a ghost of the cleft anymore.
half-dozen. Float the mud

The trowel is designed to get the mud on the wall, then the sponge float is designed to polish information technology all out. There are 2 types of floats out at that place - the red bladder and the greenish float. Kirk demonstrates them both here but in summary the red float is designed to compact the mud and the dark-green one is designed to bring the sand in the mud to the surface to create texture. For the base coat, I wasn't aiming for a texture. My goal was to shine out the fresh mud, blend it into the existing finish, and ensure It got into all the cracks. So I used a carmine float. (I used the green one on the finish glaze.)

This is where the 2nd bucket comes in handy. The offset one is holding the mud, but the second 1 is for plain 'ol water which is necessary for rinsing the float. I dunked the float in the h2o, tapped it on the side of the bucket to motion-picture show off the excess water, then rubbed the float on the wall in sorta-circular motions. I wasn't too concerned with the wait of the texture since I was going to cover information technology up, but the base coat is laying the groundwork for the top glaze, so making certain it'south smooth and in that location aren't any bumpy transitions into the existing end is primal.
Every bit the bladder filled up with mud, or if I felt besides much of a drag, I'd douse information technology in the bucket and re-rinse. Then, I'd repeat over and over and over and over smoothing out all of the mud before it hardened. Using round motions I feathered out the fresh mud until it was all smooth.
I worked in sections making my mode around the perimeter of the house. On the correct is the finished base of operations coat and the left is merely scraped and gear up for its base glaze. I made sure to prep, apply, and bladder only enough mud that I could tackle before information technology dried out completely.

Here's the "finished" base glaze. It's yet actually rough, just the surface is smooth, the edges are clean, and it'due south a solid foundation for the upcoming finish glaze.
7. Float the finish glaze
The terminate coat follows all of the above steps, and then I won't repeat them. Simply, instead of using the base material, I used a finishing coat stucco. This is the function where you need to research YOUR particular end. Since I was doing repairs, my goal was to match the existing finish, only if you're doing a fresh project, you lot can option your favorite texture. When eyeing the existing texture, keep in mind that information technology probable has several coats of pigment on it, so your new mud texture might be grittier than what you lot run into on your walls.
I used a 20/30 texture to match the existing stucco on my item abode. The irony is I basically re-stuccoed the whole house so I could have picked whatever finish. Luckily I like the fine texture of the xx/30.

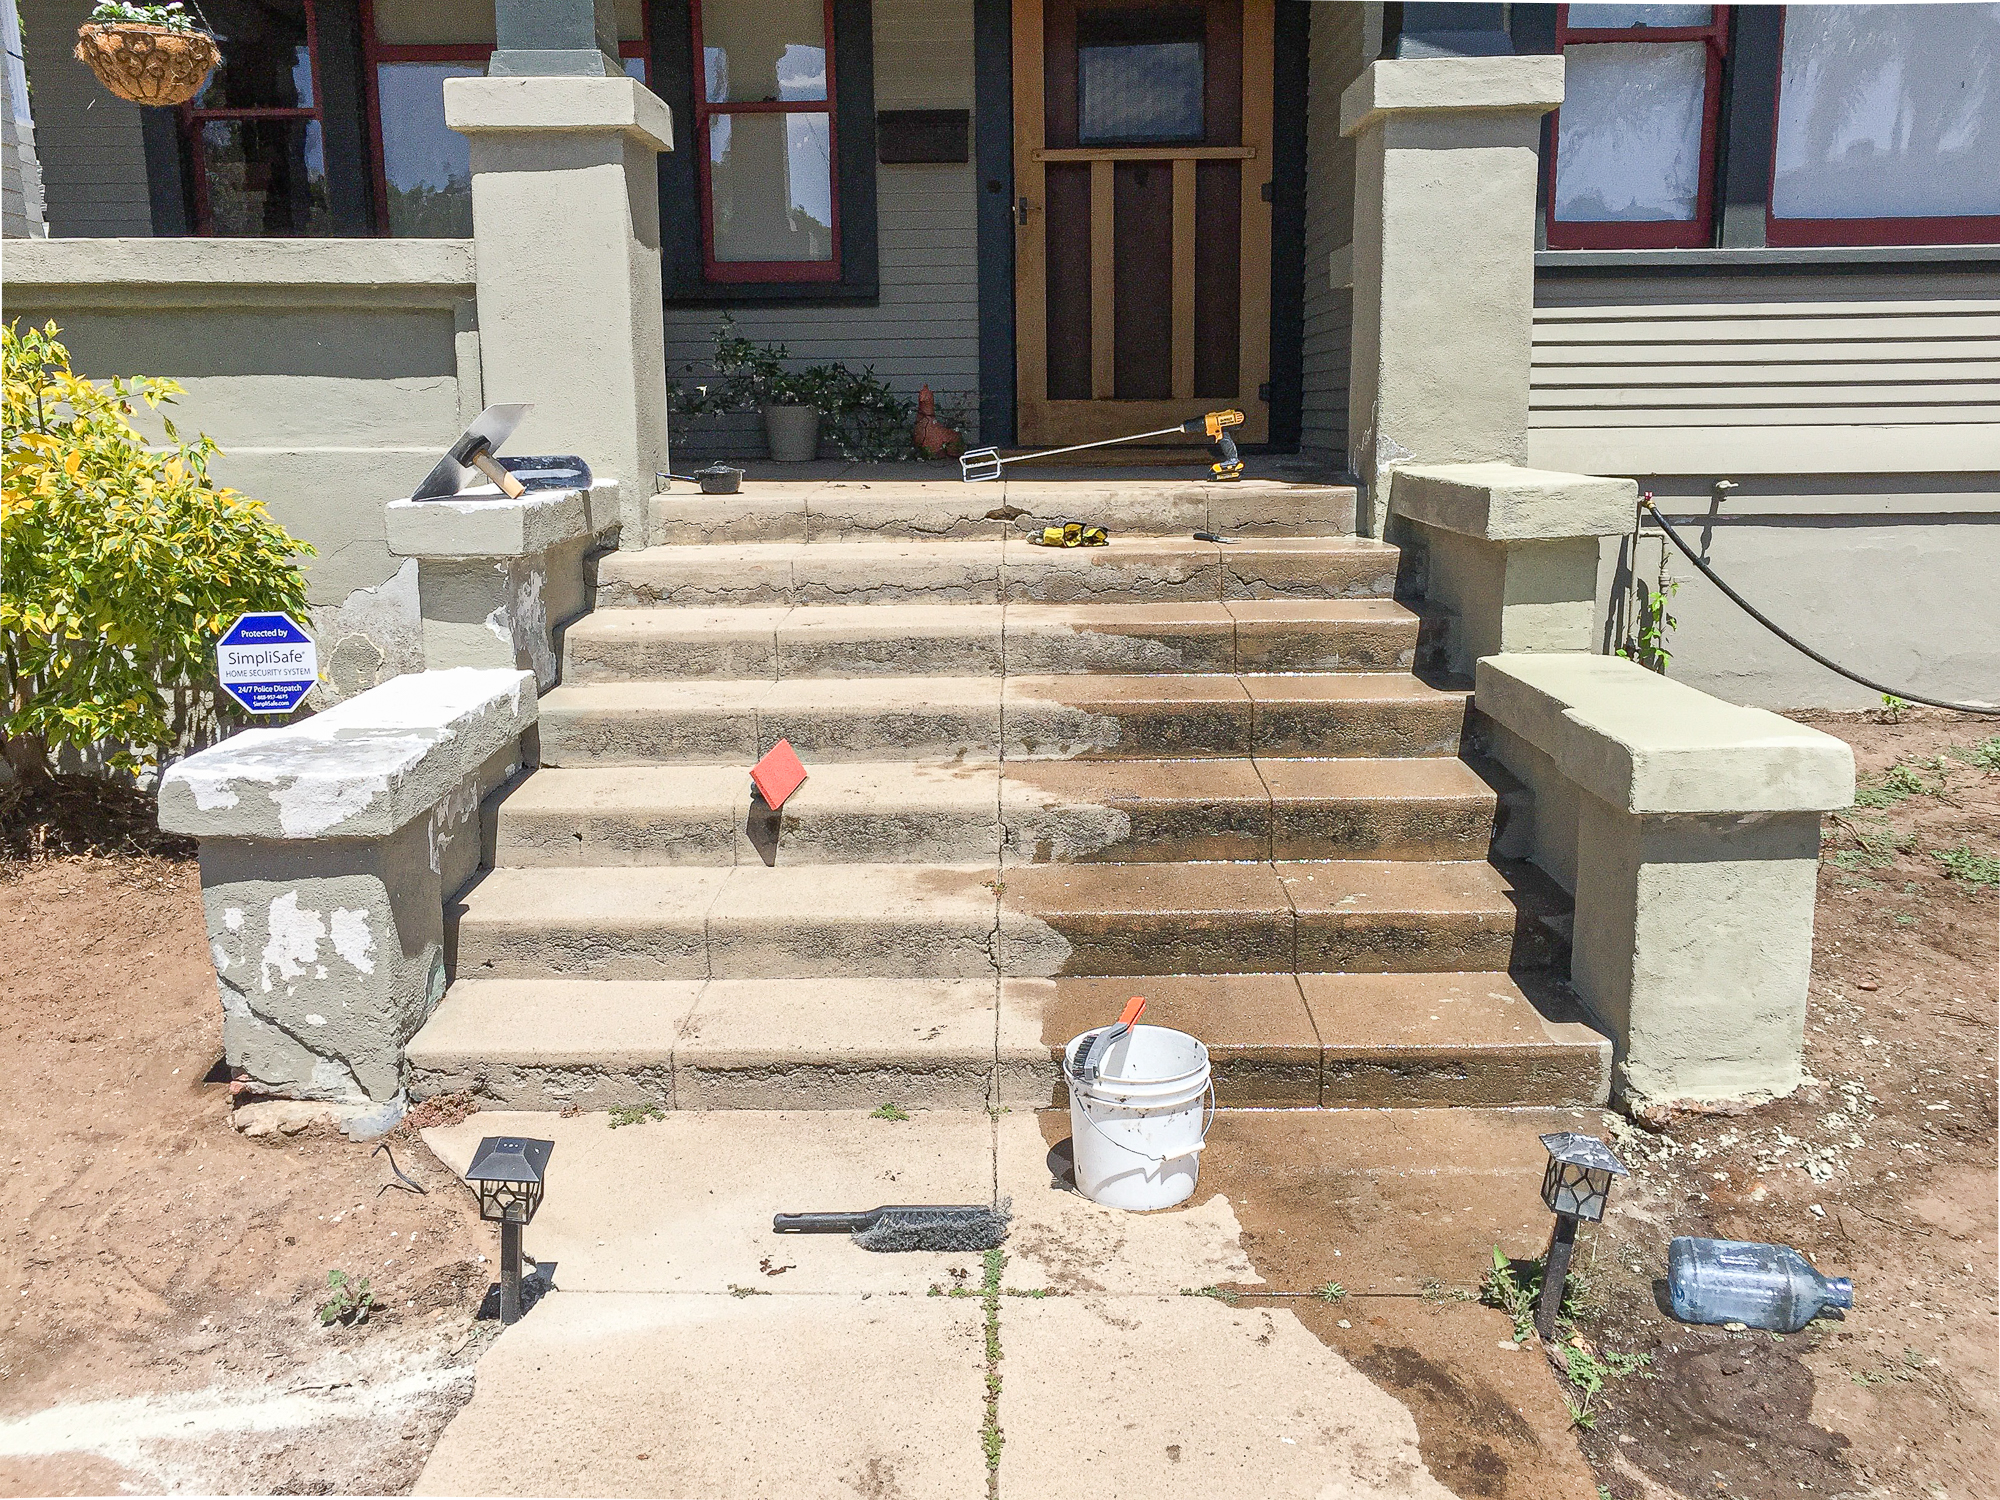
I applied the stucco with the hawk and trowel just every bit earlier, but this is the stage when I followed up with the trusty dark-green bladder. For this phase, the float'due south goal beyond evening out the surface is to create texture. The action of swirling the moisture float brings out the sand in the end which gives it the desired texture. Since this is the final surface coat, I fabricated actress sure to feather the mud into the existing top coat so it wouldn't look similar there was new stucco.
In the photo above you tin expect closely to come across the terminate glaze is practical on the sides but not the pinnacle of the columns. Notice the gritty surface on the sides simply not the top? I worked my way around and paid super shut attention to the edges to brand sure in that location weren't whatsoever precipitous corners. I would sometimes circle dorsum to a previous spot and do touch ups simply by wetting the bladder.
8. Let cure

Once everything was retextured, I allow it cure. Since water is such a critical part of the adhesion and texture of stucco and cement products, rushing to trap the moisture in with paint is never recommended. As well, rushing to dry information technology is bad, as well. I spent a few weeks watering my stucco to make sure the blazing summer estrus didn't suck the moisture besides chop-chop. After a few days of misting the walls with a garden hose, I waited for Kirk'southward recommended 28 days to permit it dry out out. Our house had these vivid white bandaids for a solid month which probably made the neighbors recollect I forgot about the project. It was clearly a piece of work in progress, okay people?
9. Prime and pigment
Once the stucco was fully cured, I painted! There are really a bunch of finish products that take a built-in colour, which is why many are called a "colour coat" but I wanted my stucco to friction match my siding color so I knew I wanted to paint it. I could have tried to get a stucco similar to the siding color, but since I plan on painting all that one 24-hour interval, I wasn't going to worry about matching a color I didn't want to keep.

I don't think I tin can clear how gooooood it felt to paint everything after the whole process. I looked back at the fourth dimension stamps of when I get-go took photos of scraping the stop and it turns out I took them in early May. Based on the pumpkins on the steps, information technology's articulate I didn't get to painting until October/November! It took an unabridged summertime because I was working total fourth dimension, the materials took fourth dimension to cure, and I besides did a bunch of other projects in between. It took me awhile, but I'g only one person, okay?!
Here's a nice view of the main area I had to repair. Looks pretty good, eh?? I hateful, at that place was previously a big crack and views to the brick underneath. Tin you lot tell some is new and some is sometime? The goal with about all of my projects is to wait similar I never did whatsoever repairs. It's kinda ironic considering an unnoticed improvement feels like it negates all the work I did, but that'south how you lot know it was a job well done.
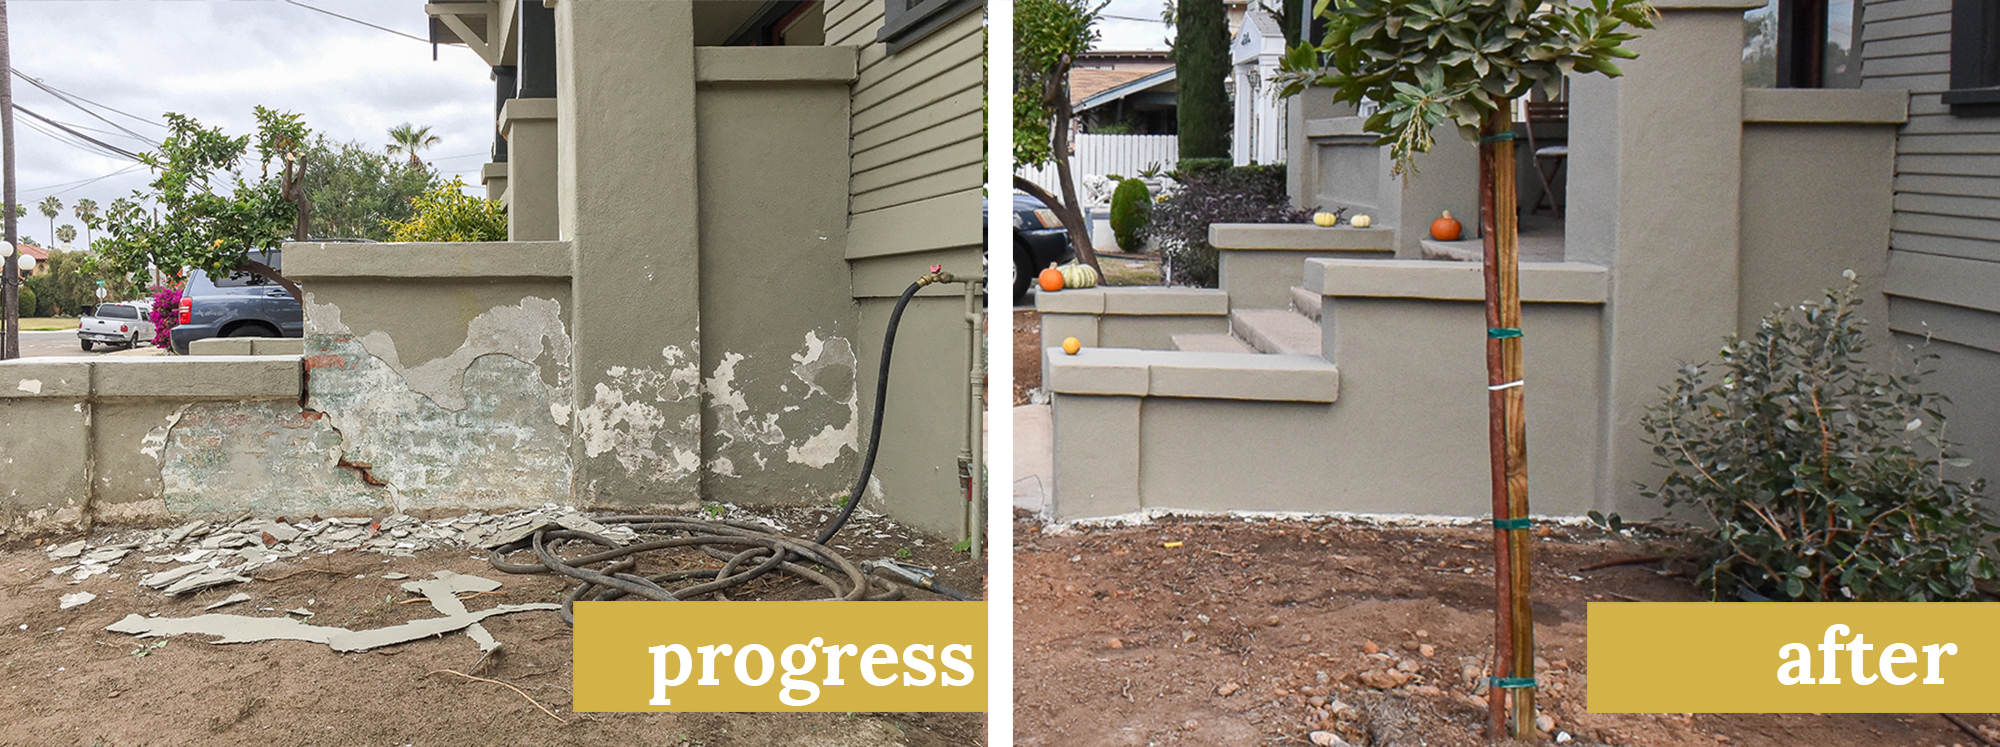

Check out the lower left corner of that column in the foreground. Such a happier lil' column.

I finished the stucco repair and the contend repair that summer just in time to plant the garden in the fall. Check out the push button beneath for more curb appeal posts and to go ahead in time to see the garden fill in.
Source: https://www.thegoldhive.com/blog/2019/5/21/repairing-the-stucco-on-the-outside-of-the-house
0 Response to "How To Repair Stucco On Exterior Of House"
Post a Comment